Published on: 8/14/2024
A comprehensive Cursor AI tutorial and guide on how to use Cursor, the innovative AI-powered code editor. Learn Cursor core features, installation process, and best practices for efficient coding with this Cursor AI editor.
Cursor AI Tutorial: Getting Started with Cursor
What is the Cursor AI Editor?
Cursor is a cutting-edge AI-powered code editor. As stated on its official website:
The AI Code Editor Built to make you extraordinarily productive, Cursor is the best way to code with AI.
The Cursor AI editor is developed based on VSCode, while most other programming tools are VSCode plugins. This allows Cursor to creatively build an efficient human-machine collaborative programming environment.
Why Choose the Cursor AI Editor?
Cursor stands out as the best AI programming tool due to several core advantages. Whether you're a programmer or a product manager, learning how to use Cursor is invaluable. With this Cursor AI tutorial, you'll discover how to create better code.
- Natural Language Programming: Through Chat and Composer, Cursor AI enables programming using natural language, simplifying the coding process.
- Code Modification Capability: The Cursor editor understands your entire project's code and can modify multiple files simultaneously.
- Powerful Context: Cursor AI can read your entire codebase and precisely specify files, symbols, folders, and network queries.
- Multi-Model Support: The Cursor AI editor supports multiple AI models, keeping it competitive in the rapidly evolving AI field.
- Customizable AI Behavior: Through the
.cursorrulesfile, you can customize Cursor's behavior to suit your needs.
Installing the Cursor AI Editor
- Visit the Cursor website to download the Cursor application.
- Install the application following standard procedures for your operating system.
- Launch Cursor and log in with your GitHub account. New users can enjoy a 2-week free Pro plan.
- Cursor offers three plans: Free, Pro, and Business. View detailed information on the pricing page.
Cursor AI Tutorial: Core Features
1. Cursor Tab: Intelligent Code Completion
This Cursor AI feature provides suggestions in gray text as you code. Note: Cursor Tab is not available when using a custom model key.
- Press
Tabto accept a suggestion, orEscto dismiss it. - Use
Ctrl/⌘ →to accept suggestions partially.
Cursor Tutorial: Using the Tab Feature
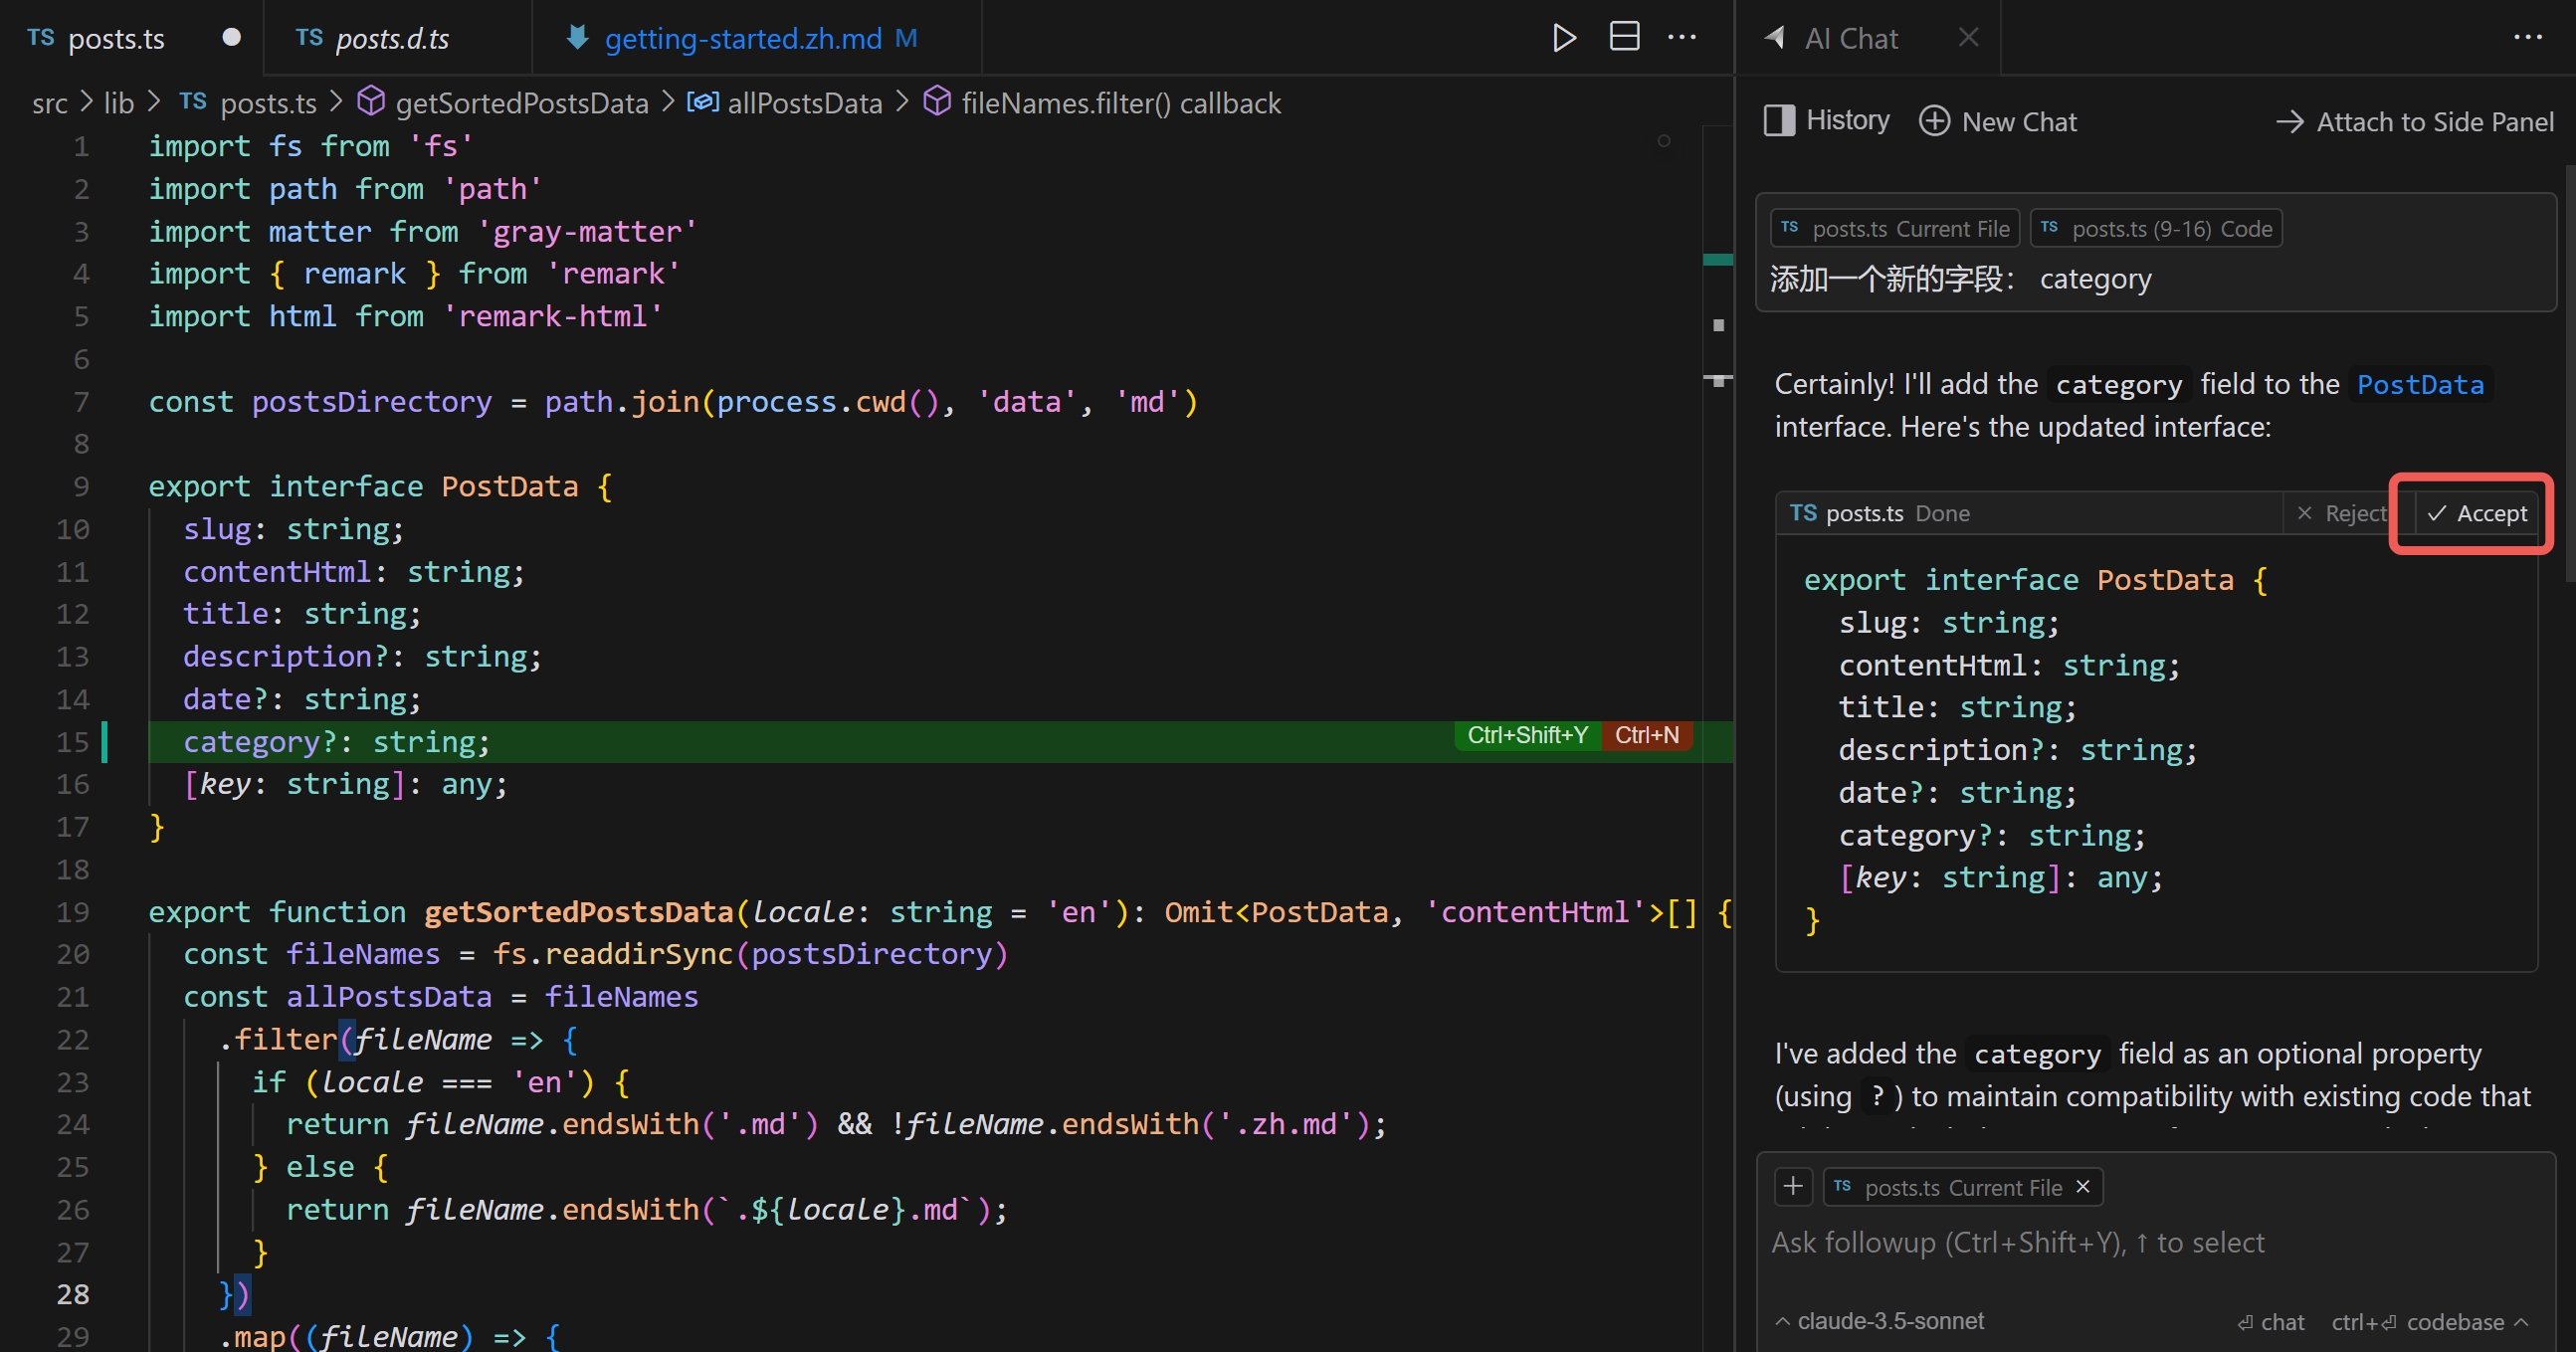
2. Cursor Chat: Interactive Coding Assistant
Access Cursor Chat with Ctrl/⌘ + L. If code is selected, using Ctrl/⌘ + L will automatically insert the code into the Chat.
Cursor Chat is like pair programming with an AI colleague who knows all the details of your project.
- Click
Applyto apply the code to the file. - Click
Acceptto accept the changes.
Cursor Tutorial: Using Cursor Chat
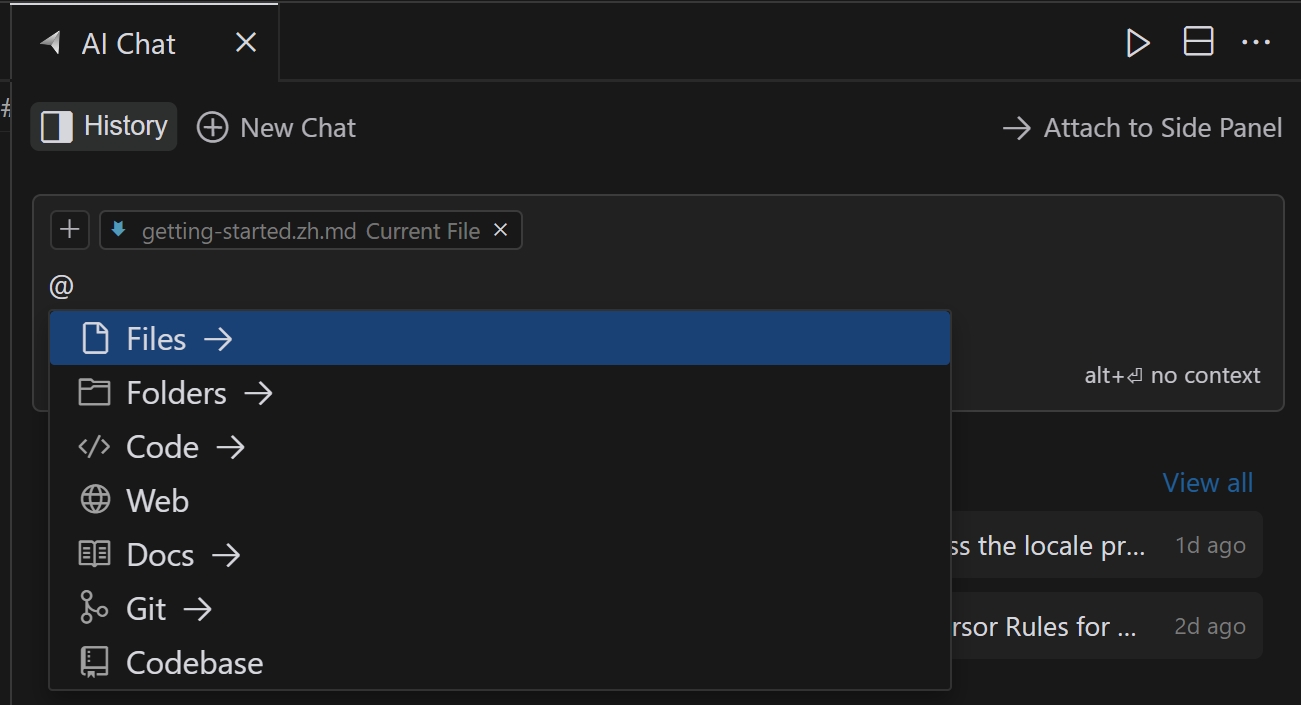
Cursor AI Chat Tips
- Use
@symbols to put specific files, symbols, or folders into context. - Use
Ctrl/⌘+Enterto search the entire codebase. - Use
@Webto search the internet. - Directly paste images for clearer communication.
AI Fix in Cursor Chat
When there's a Lint error, moving the mouse over it will show an AI Fix button. Clicking it will automatically modify the code using Cursor AI.
Reference documentation:
3. Cmd K: Code Generation and Editing
This Cursor AI feature facilitates code generation and editing:
- Select code, click
Edit, then describe how the code should be changed. - To generate new code, input
Cmd/Ctrl + Kwithout selecting any code. - Enter instructions for new code or edits.
- Press
Enterto apply the changes.
Cmd K in Terminal
In the Terminal, you can also use Ctrl/⌘ + K to generate command lines with Cursor AI.
Cursor 101 Tutorial: Are You Really Using the Prompt Bar (Cmd K) Feature Effectively?
4. @Codebase: Global Code Search
@Codebase enables project-wide code search in the Cursor editor:
- Use "@Codebase" to search your entire project for specific code elements.
- Cursor provides relevant results from across your codebase.
Example: "@Codebase find all uses of UserContext"
5. Rules for AI: Customized Behavior
Cursor allows you to customize its AI behavior through rules:
- Global AI rules: Configure in
Cursor Settings > General > Rules for AI. - Project AI rules: Create a
.cursorrulesfile in your project folder.
Getting Started with Cursor AI
- Open a new or existing project in the Cursor editor.
- Experiment with Cursor Tab for code completions.
- Utilize @Codebase to explore your project structure.
- Use Cursor Chat for natural language programming.
Next Steps in Your Cursor AI Journey
As you continue to use Cursor, you'll discover more ways to integrate it into your development process. Here are some suggestions to help you master Cursor:
-
Learn Composer: Composer is another powerful feature of the Cursor AI editor that can enhance your programming productivity. Learn more about Composer in Cursor
-
Watch Project Videos: Our Use Cases page collects many excellent examples of Cursor in action.
-
Customize Cursor Rules: Create and optimize your own Cursor Rules to improve AI-assisted coding efficiency. Learn how to create Cursor Rules
-
Apply in Real Projects: The best way to learn is through practice. Use Cursor comprehensively in your next project.
-
Stay Updated: Regularly check the official Cursor blog for the latest features and improvements.
By following this Cursor AI tutorial and guide, you'll be able to leverage Cursor's powerful features and improve your programming efficiency and code quality. We wish you success in your AI-assisted programming journey with Cursor!